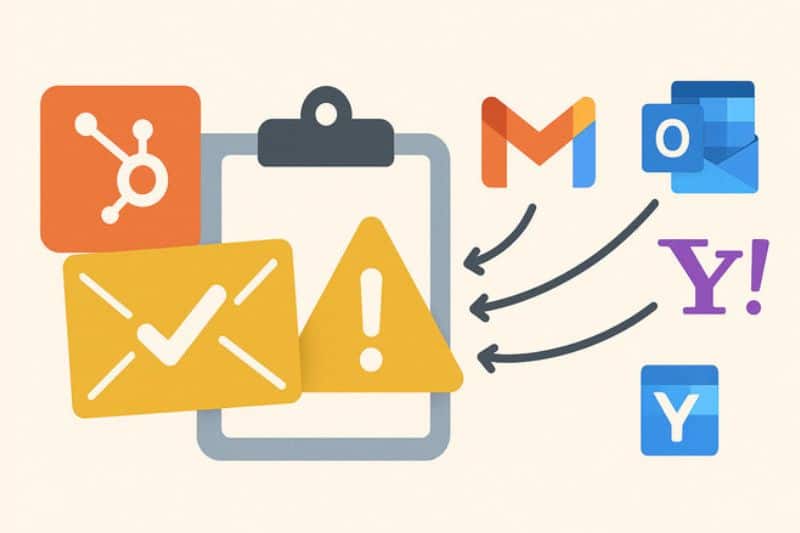
HubSpot will happily tell you an email is “valid,” but Gmail, Outlook, and Yahoo don’t always agree. They judge you on what lands and gets read, not what’s in your CRM.
That difference in interpretation is how you end up with fake signups, hard bounces, and a sender reputation sliding downhill while everything still looks fine on your end.
This is where the concept of “HubSpot email validation” comes up, and in this article, we’ll explain why it fails, how to make use of it, and what it all means for inbox placement.
Key takeaways
- Validated emails in HubSpot result in fewer bounces, clearer reporting, and less damage to your domain.
- HubSpot’s native checks are fine as backup, but they won’t keep your sender reputation out of trouble on their own. For better inbox placement, create better control over who enters your CRM and who you continue emailing.
What HubSpot does when it “validates” an email
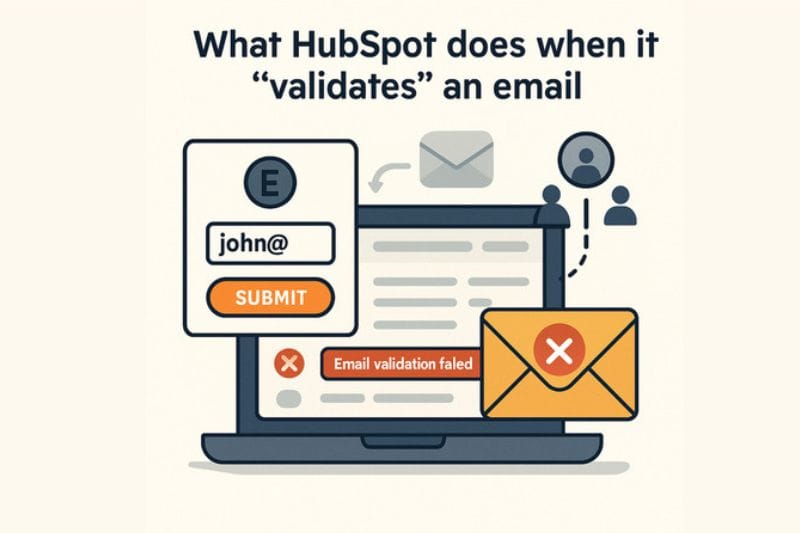
HubSpot does a few useful things by default. It checks whether an email looks like an email (syntax), so john@ doesn’t slide through your forms. It also keeps a shared memory of addresses that have hard-bounced in other HubSpot accounts, and it automatically suppresses those from future sends. In the CRM, this appears as bounce-related properties and “non-marketing” statuses, which makes it feel like HubSpot is actively protecting you from bad data.
The reality is a bit less comforting. HubSpot isn’t sweeping your whole database and asking, “Can this address actually receive mail today?” It doesn’t flag disposable domains, role accounts, or risky catch-all domains out of the box. It’s not judging whether an address is likely to engage; it’s just tracking whether it has already failed. In other words, HubSpot’s email validation is mostly reactive. It activates after something goes wrong, not before you send a campaign.
When you see “email validation failed” in HubSpot
“Email validation failed” in HubSpot (often searched as “email validation failed HubSpot”) doesn’t mean the address was dangerous. It usually means HubSpot couldn’t confirm the email format, or the domain didn’t resolve at the moment of creation. It’s a lightweight check. The problem is that many risky or undeliverable emails never trigger this message, which is why relying on it alone leads to bounces later.
How bad emails still sneak into your HubSpot CRM
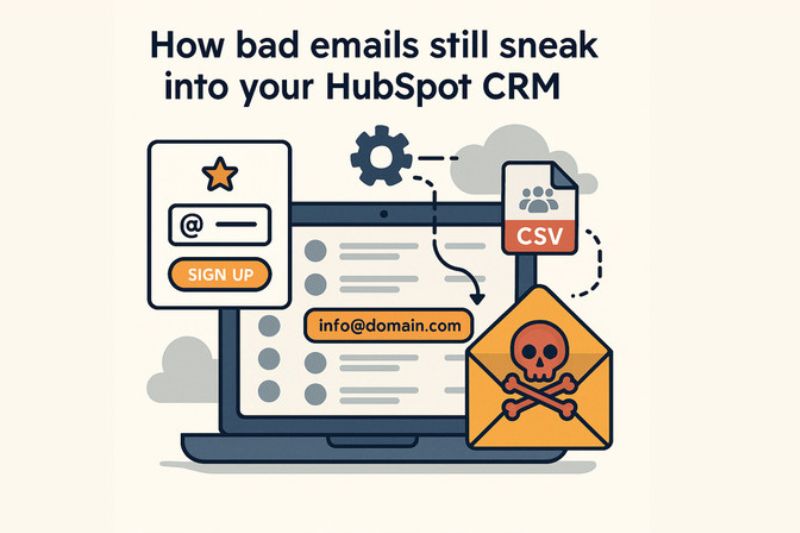
A lot of bad data gets in through your forms. HubSpot will block the obvious junk like test@test or a missing @, but it won’t stop a disposable inbox that works for 10 minutes or a role address like info@domain.com. Those technically “valid” emails almost never engage. They sign up for a trial, a newsletter, grab a free resource, and then your nurtures go straight into a dead or inactive inbox. On paper, your acquisition looks healthy; in reality, those leads never engage and eventually drag down performance.
Then you’ve got the data entering through the side doors:
- Old CSV imports from “warm” lists that were never validated
- HubSpot integrations auto-creating contacts without checks
- SDRs guessing email formats during calls
All of it lands in HubSpot, appearing legitimate until your next send slams into a bunch of bounces.
The worst offenders are usually the oldest lists. Segments that haven’t been mailed in years, or were built before anyone on the team cared about validation, are almost always full of dead inboxes and abandoned domains. Every time you mail them, your hard bounce rate jumps and inbox placement drops. HubSpot will suppress some of these addresses, but mailbox providers keep the full history on your domain and IP long after those contacts disappear from your send list.
Building proper email validation into your HubSpot setup
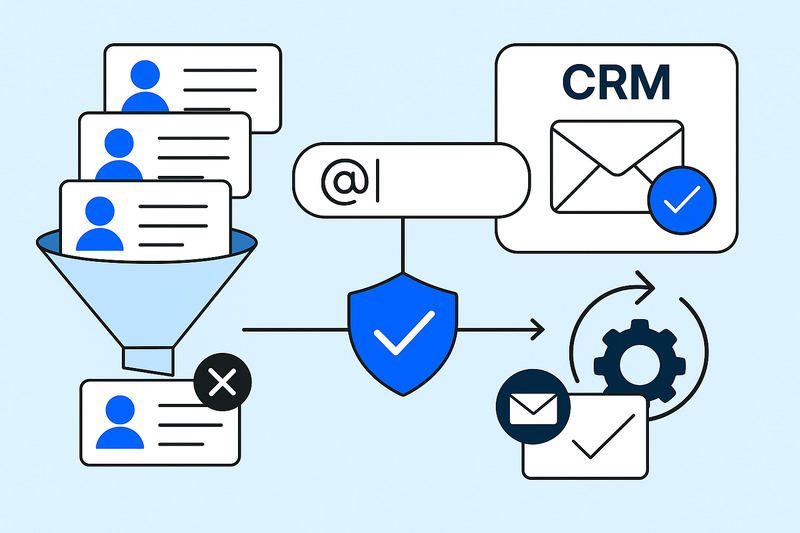
Fixing this comes down to two choke points: the lists you already email, and the places new contacts enter HubSpot.
Start with the lists you email regularly. Connect a HubSpot email verification tool, run your core segments through it, and sync back simple status fields like valid, invalid, risky, and disposable. Then create active lists that auto-exclude anything flagged. Clean the pool once; let HubSpot maintain the separation.
Next: real-time checks. Add validation at the form submission point, like marketplace apps, a JS widget, or an API access. The goal is simple:
- Block undeliverable/disposable addresses
- Tag anything suspicious
- Control who becomes a contact
Store that status so workflows can enforce “only enroll if deliverable.”
Finally, keep it tidy with light automation:
- Re-check when a contact is created or the email changes
- Auto-tag bad statuses into exclusion lists
- Spend validation credits only on lists that you send to regularly
This gives you 90% of the value without overengineering anything.
Why validation is not just a cleanup chore
Repeated sends to dead inboxes spike your hard bounce rate, and that’s one of the worst negative signals you can send. When that trend appears, Gmail/Outlook/Yahoo start routing more of your HubSpot mail into spam or secondary tabs. Proper validation slows that spiral down and gives your domain breathing room. That’s the boring but necessary foundation of better inbox placement.
But clean data alone doesn’t convince anyone your emails are worth keeping. Validation answers “Can this inbox receive?” It doesn’t answer “should we prioritize this sender?” For that kind of control, you can integrate InboxAlly into your HubSpot setup. A solid hubspot email marketing integration keeps everything connected while improving how your emails land and get seen. It adds a simple layer of control without changing how your team already works.
These tools use seed accounts that behave like real people: they open, scroll, click, reply, take emails out of spam, and mark them as important. That behaviour matches the exact engagement signals mailbox providers use to judge senders. Once you’ve stopped hammering invalid emails, this consistent positive engagement helps repair poor domain or IP reputation and makes your future HubSpot campaigns easier to deliver.
HubSpot setups that don’t wreck your sender reputation
Now that we’ve talked about why validation matters, let’s turn it into something your HubSpot actually does for you.
Start with a single safety net. Take the results from your email verification tool and map them into HubSpot properties. Then build one active list that excludes everything marked invalid, disposable, or high-risk. Make that list a global exclusion on every marketing email and workflow. Add HubSpot’s own bounce-type properties into the filter so any address that later hard-bounces also gets caught and removed automatically. One list, everywhere, no debate.
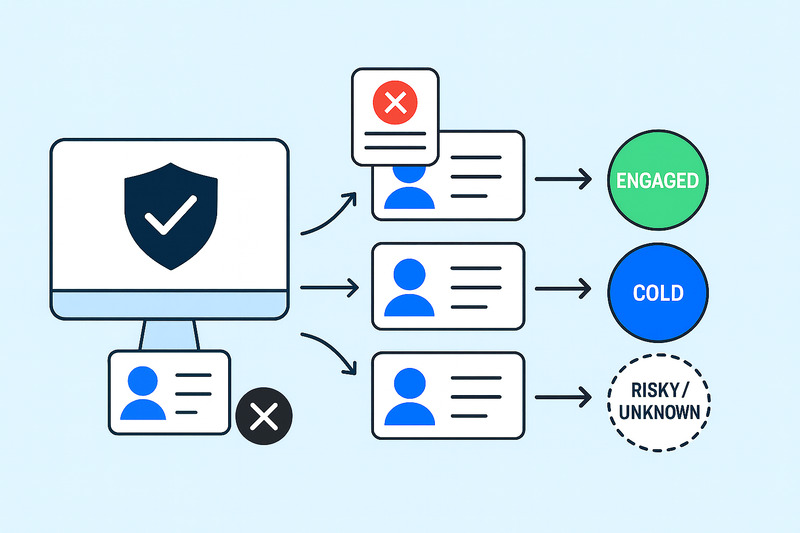
From there, stop treating all “valid” contacts the same. Split your sends by both validation status and behaviour: valid & engaged, valid & cold, and risky/unknown. The first group gets your main sequences and launches. The second gets slower, lighter touch or re-engagement flows. The last one, however, gets either very gentle testing or a different channel altogether.
And don’t guess whether it’s working. Watch your hard bounce rate before vs after validation, the share of new contacts blocked at form submit, and how your “valid & engaged” segment grows over time. If you’re running InboxAlly alongside this, track inbox placement trends too. You’ll see the compounding effect faster than any dashboard summary.
Where this leaves your HubSpot email strategy
HubSpot keeps things running, but it doesn’t protect your sender reputation. The proper strategy is more nuanced: validate what you send to, validate in real time at capture, exclude junk everywhere, and then work on engagement so mailbox providers see signs of life.
If you want reliable engagement behind your next campaign, book a free InboxAlly demo and see how the right approach can change your inbox placement.