
If your emails keep going to spam or aren’t delivered at all, your domain or IP address might be on an email blacklist. This can seriously disrupt your communication, damage your sender reputation, and lead to ongoing deliverability problems.
Fortunately, email blacklist removal is possible if you follow the correct process. This guide walks you through how to identify a blacklist issue, fix the underlying cause, and request removal. You will also learn how to reduce the risk of getting blacklisted again.
Quick Summary: How to Get Off an Email Blacklist
To get off an email blacklist, first check which blacklists you’re on using a Blacklist tool or bounce message. Pause all sending from the affected domain or IP. Identify and fix the root issue, such as spam traps, bad mailing lists, or security problems. Then request removal through the blacklist’s website or support form.

Common Email Blacklists and How to Get Delisted
There are dozens of IP blacklist databases, but only a handful are widely used by mailbox providers. Here’s a breakdown of the most common blacklists, how they work, and how to request email blacklist removal from each.
| Blacklist | Manual Removal | Removal Process | |
| Spamhaus ZEN | Yes | https://check.spamhaus.org/ | If you are a general user, speak with your Internet Service Provider (ISP) to seek remediation. |
| Barracuda | Yes | Barracuda Central Reputation System Removal Request form. | Manual removal request through the Barracuda Central Reputation System Removal Request form. |
| SpamCop | No | https://www.spamcop.net/ | Listings expire automatically in 24–48 hours if no new spam reports. |
| Uceprotect1 | No | https://www.uceprotect.net/en/ | UCEPROTECTL1 automatically removes IP addresses after seven days of no spam detection. |
| Uceprotect2 | No | https://www.uceprotect.net/en/ | To get off the UCEPROTECTL2 blacklist, you need to first address the underlying issue of spam activity from your server and then allow for automatic delisting, which can take up to 7 days. |
| Uceprotect3 | No | https://www.uceprotect.net/en/ | UCEPROTECTL3 automatically removes IP addresses after seven consecutive days of no spam activity. Alternatively, you can pay a fee for immediate removal. |
| xbl.spamhaus.org | Yes | https://check.spamhaus.org/ | If your IP is listed on the Exploits Blocklist, visit the Spamhaus IP and Domain Reputation Checker, which provides more details about the listing and is the only place where XBL removals can be requested. |
| sbl.spamhaus.org | Yes | https://check.spamhaus.org/ | Identify the reason for the listing and then work with your Internet Service Provider (ISP) to resolve the issue. Once the problem is fixed, your ISP can submit a removal request to Spamhaus. |
| pbl.spamhaus.org | Yes | https://check.spamhaus.org/ | Address the reason for the listing (e.g., incorrect configuration, malware, etc.) and then request delisting through your Internet Service Provider (ISP) or hosting provider. |
| psbl.surriel.com | Yes | https://psbl.org/remove | Promptly address the cause, then submit a removal request via their website. Listings may expire automatically if no further spam is detected. |
| cbl.abuseat.org | Yes | cbl.abuseat.org | Check your IP at cbl.abuseat.org to see why it was listed, then fix the issue (like malware or misconfig). Once resolved, return to the page and click the remove button to request delisting. |
| z.mailspike.net | Yes | https://mailspike.io/ip_verify | Check the reason for being blacklisted on their site, make the necessary corrections, and request removal. |
| Sem Fresh | Yes | https://spameatingmonkey.com/ | Visit their lookup tool to confirm the listing, then follow their delisting instructions and submit a removal request via their designated form or contact method. |
| Invaluement | Yes | https://www.invaluement.com/removal/ | Address the reason for the listing and then submit a delisting request. |
| Lashback | Yes | https://blacklist.lashback.com/ | Fix the issue by ensuring you honor all unsubscribe requests and remove any suppressed or outdated contacts. Then submit a delisting request explaining what you’ve resolved. |
| abuse.ro | Yes | https://abuse.ro/ | A notification must be sent from the postmaster address to the contact address, with evidence that spam flow has been stopped. |
General Removal Steps (Applies to Most Blacklists)
The email blacklist removal process usually follows the same core steps:
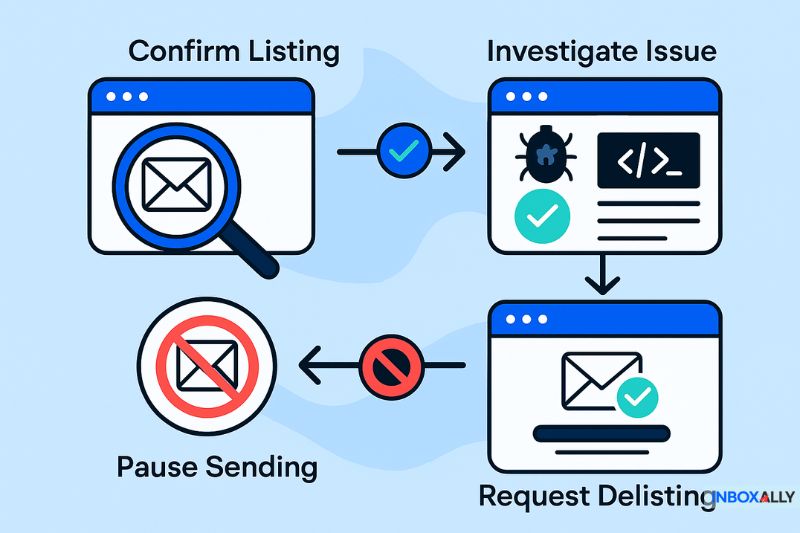
Step One: Confirm the Listing
Use the blacklist’s lookup tool or a bulk blacklist checker to see if your IP or domain is listed. These tools will tell you which blacklist provider flagged you and often include additional context, such as the type of listing or recent complaints.
Step Two: Investigate and Fix the Root Cause
Start by looking up your IP or domain using the blacklist’s official lookup tool. Many of these tools will show why you were listed, such as spam trap hits, open relays, or suspicious sending behavior.
If no reason is provided:
- Check recent bouncebacks for error messages that reference spam issues or misconfiguration.
- Review recent email campaign data for spikes in volume, spam complaint rates, or invalid addresses.
- Scan your email server for malware or unauthorized sending.
- Ask your email provider or host if they can share logs or diagnostics related to your blacklist status.
It’s important that you fix the issue before submitting a removal request. If you don’t address the root cause, you may be relisted quickly.
Step Three: Pause Bulk Sending
Temporarily stop all outbound email from the listed domain or IP to avoid making the situation worse.
Step Four: Request Delisting
Visit the blacklist’s website and follow their removal process. Some allow automatic removal after a period of no spam, while others require a manual request or explanation of the fix.
How to Avoid Being Blacklisted

Prevention is always better than removal. This section outlines smart sending habits, authentication tips, and list hygiene practices that reduce your risk of ending up on a blacklist in the first place.
1. Use SPF, DKIM, and DMARC
These technical records prove your email isn’t forged. If you’re using your own domain, most email platforms will walk you through how to add these to your DNS settings. If you’re not sure, ask your web host or IT person to help you set it up.
If you’re not sure what these terms mean and how to implement them, please see our SPF, DKIM, DMARC Explained guide.
2. Only email people who asked to hear from you
Never buy or scrape email lists. These often include fake email addresses, inactive email addresses, or spam traps. So, if someone didn’t sign up through your form or give you permission, don’t email them.
3. Clean your list regularly
If people stop opening your emails or addresses start bouncing, it’s time to clean your list. Remove hard bounces and unengaged contacts regularly. Most platforms show you open/click rates. You should use these to trim your list to the people who would genuinely still like to hear from you.
4. Send consistently, not erratically
Sudden spikes in volume, poor engagement, or spammy content can harm your sender reputation. Avoid sending nothing for months and then blasting your whole list. Email providers notice sudden spikes. Start small and build up gradually, especially if you’re using a new domain or IP address.
5. Secure your mail server and accounts
Ensure your mail server is properly configured to prevent open relay abuse. Scan for malware, enforce strong passwords, enable two-factor authentication, and review your server logs to spot any unauthorized activity. Only trusted users and applications should be allowed to send mail.
6. Respect unsubscribe requests
Every marketing email should have a clear unsubscribe link. Not only is this legally required, it helps avoid spam complaints. Never try to hide it or make people log in to unsubscribe. If users can’t find the link, they’ll mark your unwanted email as spam instead.
7. Use a dedicated IP address (if sending high volumes)
If you regularly send large volumes of email, consider using a dedicated IP instead of a shared one. With a dedicated IP, your reputation is entirely in your hands, so you won’t be affected by other senders’ mistakes. Just remember that dedicated IPs need to be warmed up gradually. If you’re not sending much email, a shared IP with a reputable provider may be safer.
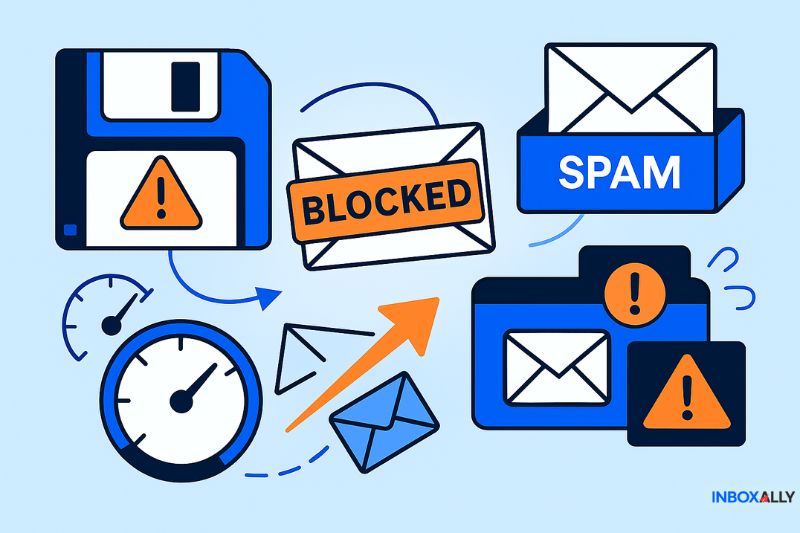
Signs of Being Blacklisted
The most common signs of being blacklisted include a sudden drop in email deliverability, high bounce rates, and frequent spam folder placement, even when sending to known contacts.
If your emails are no longer reaching inboxes and nothing has changed on your end, there’s a good chance your IP or domain has been flagged by one or more blacklists.
Here’s a breakdown of symptoms to watch for:
1. High Bounce Rates
If a large number of your emails suddenly bounce, especially with error codes mentioning “blocked,” “blacklisted,” or “reputation,” it’s a strong indicator that your sending IP or domain is on a blacklist. This is often the first clear warning sign.
2. Emails Going to Spam
Even if your messages are technically delivered, blacklists can cause inbox providers like Gmail or Outlook to place them in the spam folder. If recipients say they’re not seeing your emails, or if test emails keep landing in spam, blacklist status may be the cause.
3. Declining Open Rates
A noticeable drop in open rates, without changes to your subject lines, timing, or audience, can indicate that emails are being filtered away from inboxes. When emails do not land where they should, recipients never see or open them.
4. Delayed or Blocked Outbound Emails
Some mail servers slow down or queue outbound mail when they detect deliverability issues. You might notice emails taking much longer than usual to go through, or failing silently in the background.
5. Error Messages in Bounce Logs
Bounceback emails may include clues such as “550 Message blocked”, “521 Domain blacklisted” or “Rejected – listed in RBL”. These messages typically refer to blacklist-related problems or poor sender reputation.
6. Notifications from Your ESP or IT Team
If you are using an email service provider like Mailchimp, SendGrid, or Postmark, you may receive a warning about blacklist activity. Your IT team or hosting provider might also notify you if they detect a listing tied to your domain or IP.
7. Blacklist Monitoring Alerts
Tools like InboxAlly can notify you as soon as your domain or IP appears on a blacklist. These alerts help you catch issues early before they cause major deliverability damage.
Conclusion
Ending up on an email blacklist can feel overwhelming, especially when you’re not sure what went wrong or how to fix it. But the good news is, it’s fixable. With a bit of investigation, a clear plan, and a pause in sending, you can get things back on track.
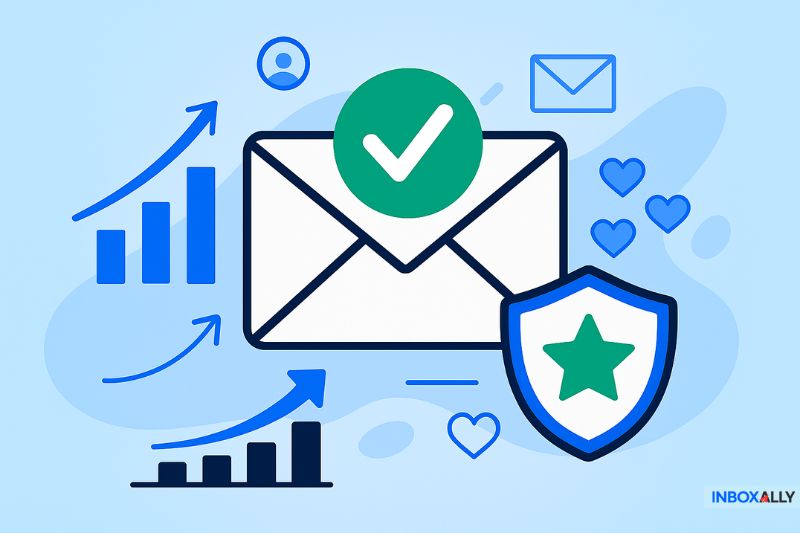
The real win, though, isn’t just getting delisted; it’s learning how to stay off blacklists for good. That means tightening up your email practices, sending to people who actually want to hear from you, and keeping an eye on your sender reputation. Prevention is cheaper and far less stressful than recovery.
At the end of the day, deliverability isn’t about gaming the system. It’s about being a responsible email sender who respects the inbox. When you focus on healthy email habits, engagement, and transparency, you build a positive sender reputation, and that’s the key to long-term success in email.
If you’re looking for a smarter, easier way to stay out of trouble with email delivery, take a look at InboxAlly. InboxAlly helps legitimate senders land in the inbox, not spam. Their platform simulates real user engagement, which teaches inbox providers that your emails are wanted. You’ll get alerts if anything starts to slip, and the tool helps you recover quickly if things go sideways.
Frequently Asked Questions
Still have questions? This section covers common concerns about blacklists, what they mean, and how to deal with providers like Spamhaus. Helpful whether you’re cleaning up your domain or troubleshooting a spike in spam placement.